One digital system for all your FPV drones. Small size, Race mode, 1080P recording, 500mW power and 3.1-13V input
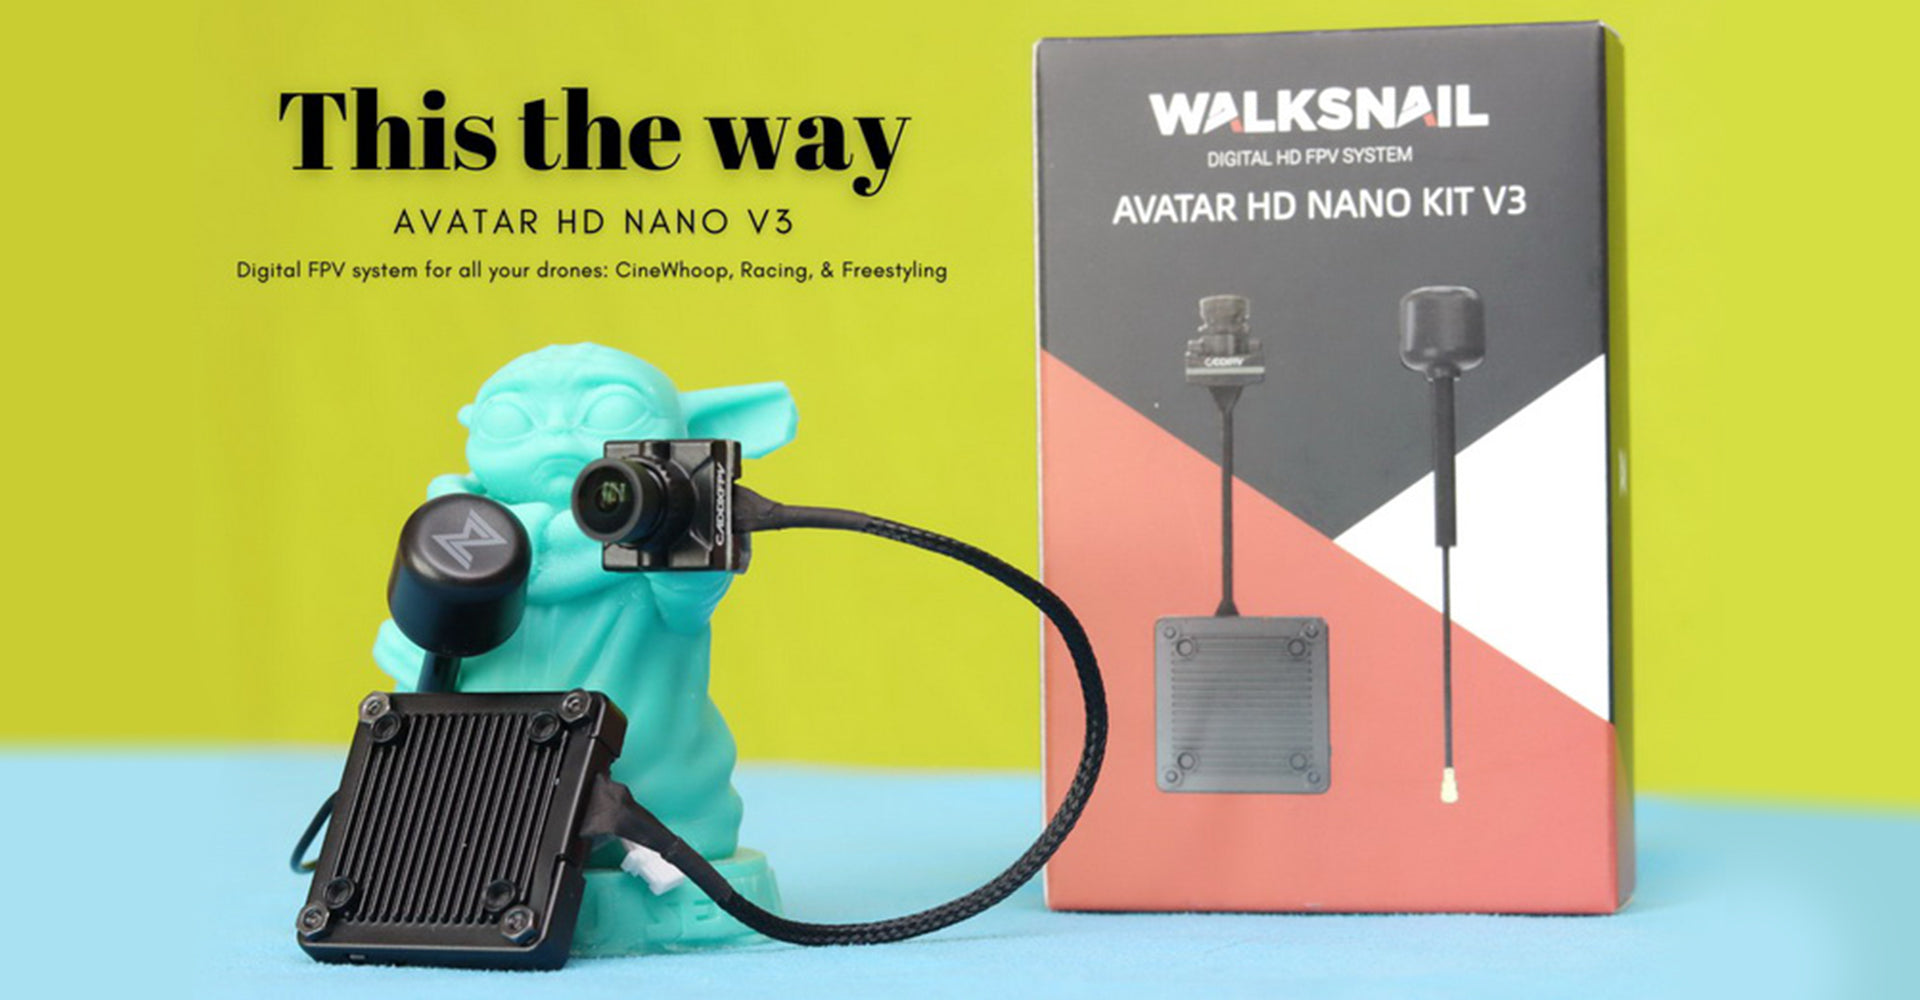
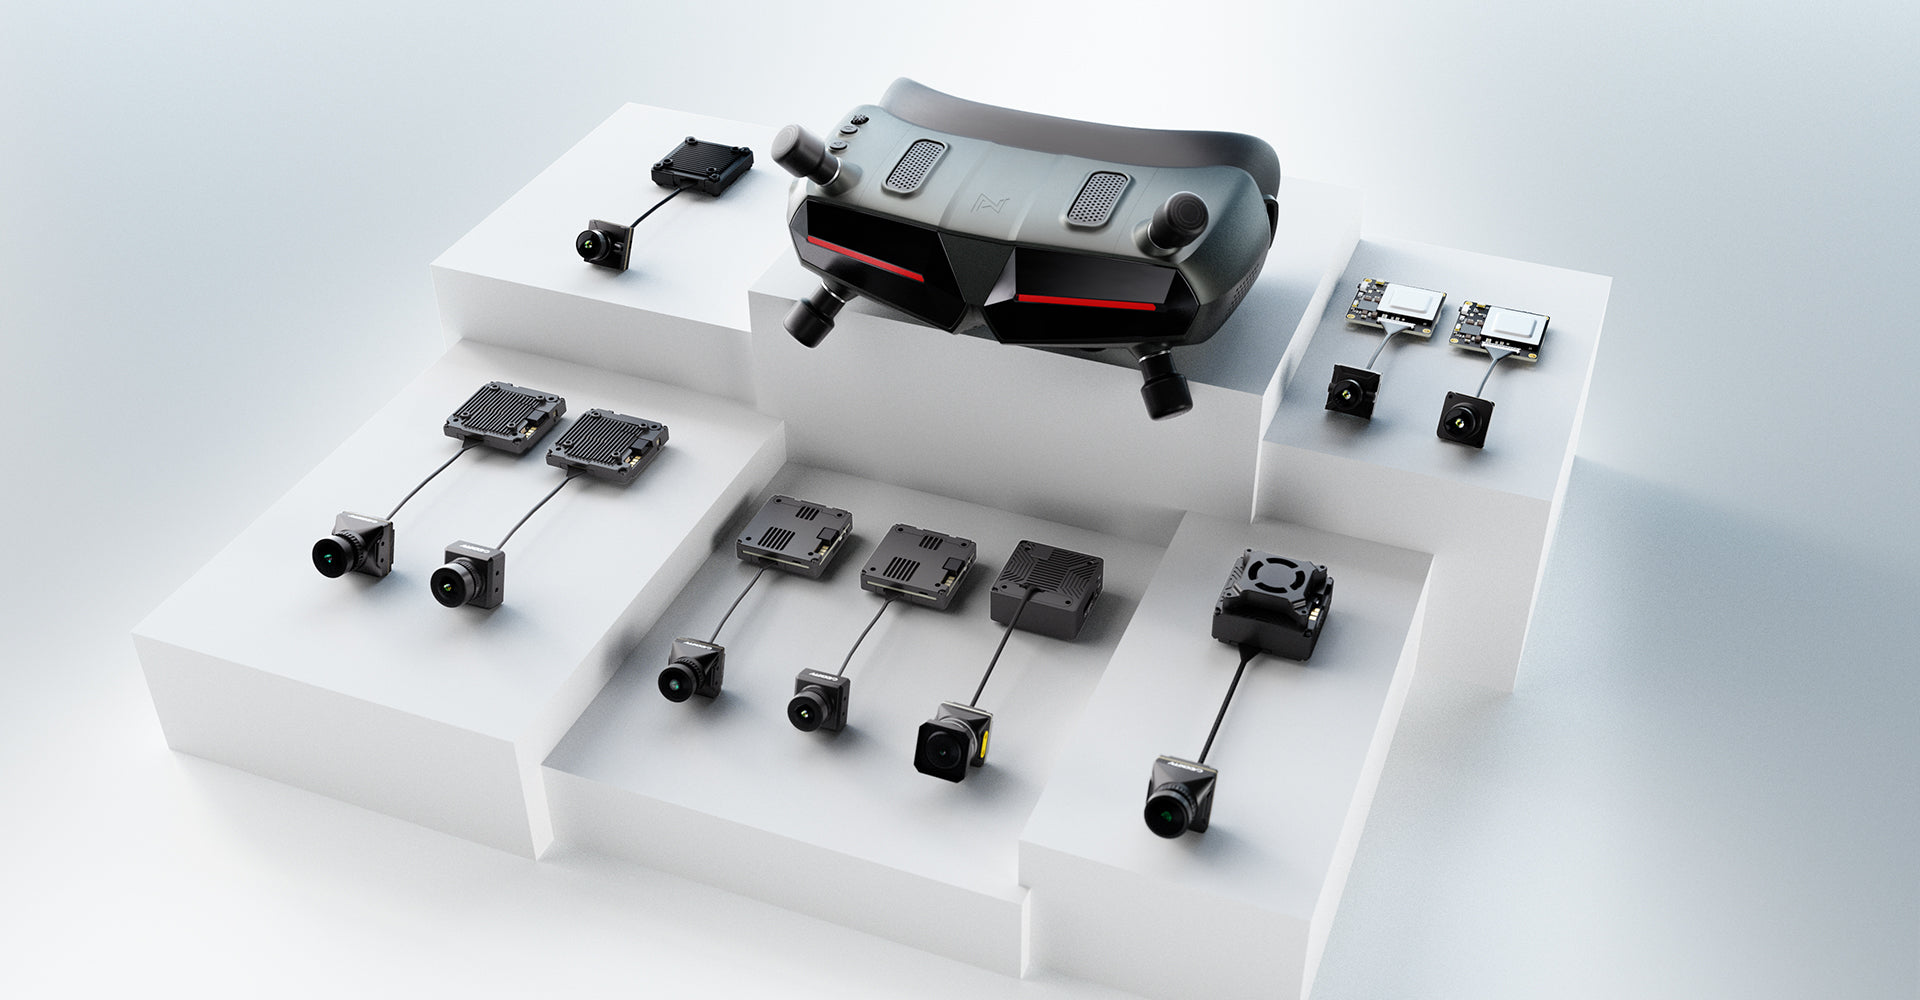
Last month, Caddx introduced its fifth digital FPV kit, the Walksnail Avatar HD Nano V3. Although its name is suggested to be super small, it is one of their most sophisticated video transmission systems suitable for small CineWhoop drones and bigger racing/freestyling FPV quadcopters. This new release introduces racing mode, which promises to improve latency stability.
Being able to switch between quality mode and latency mode makes the new Walksnail Avatar HD Nano V3 a unique product. Practically, it mixes the capabilities of the DJI FPV digital system known for outstanding video quality and the low latency of the HDZero and analog systems.
Analog FPV is still widely used and preferred for racing due to its affordability, low latency, and longer range, while digital FPV is favored for cinematic due to its superior video quality and interference resistance. While in analog FPV systems, any dropped frame due to a poor link quality or interface is lost forever, in digital FPV, dropped frames are trying to retransmit by advanced error correction algorithms, which increases latency.
Walksnail Avatar Nano Kit V3 review
Disclosure: I received this digital FPV kit as part of a product review collaboration with CaddxFPV. Technical specs and quality may vary according to the manufacturer’s reliability, so I cannot guarantee that you will get an identical product, as seen in my article.
Although Caddx sent me the Avatar Nano V3 kit with FedEx for faster delivery, it took twenty days to receive it. Just like the Mini 1S and Mini 1S Lite, the V3 kit is also packed in a cigarette pack-size box. The kit includes an Avatar V3 VTX, a Nano camera, a V2 antenna, a 4-pin USB cable, a 14 to 19-mm bracket, and mounting accessories.
At a glance
At first look, visually, there is not much change between the V2 and V3 -both VTXs look like a black heatsink. If you put them side by side, you can see that the V3 is slightly smaller as it is also intended for small 1S FPV drones. The Avatar Nano VTX measures 31.5*31.5*9.4mm and weighs 13.4g (about four grams lighter than V2). It has 25.5*25.5mm (M2) and 20*20mm (M3) and mounting patterns. The antenna has a commonly used UFL connector and can be secured by a retention bar.
The Avatar V3 VTX comes with a pre-soldered and cemented data/power cable (Uart TX, Uart RX, GND, Power 3.1-13V pin layout). As most flight controllers have a 6-pin DJI digital FPV connector, I asked Caddx what kind of FC is compatible with the 4-pin connector at the end of the cable, but they didn’t answer. Near the solder pads is a status LED and a tiny bind button.
The VTX has 32GB built-in storage, and the files can be transferred using the included 4-pin to USB A cable. Again, I would have liked to see a Type-C port versus the non-standard data port that can easily get damaged -especially since there’s no SD card slot and you are limited to onboard recording. The unit can record up to 1080P@60fps or 720P@120fps videos, but no gyro data is stored for further image stabilization.
Intended for all-size drones, the Avatar Nano camera measures just 14*14*16.8mm and weighs 3 grams. For bigger racing quads, a 14 to 19-mm mounting bracket is included. The camera has a 1/3.2-Inch native 4:3 image sensor and a 2.1mm lens that provides a 160° field of view. Out-of-the-box comes with a 90mm MIPI cable, but a 140mm one is also available if needed.
Price, availability, and alternatives
The latest Avatar Nano V3 kit with built-in 32G memory can be ordered from Caddx for $109.00. You should check the Walksnail Avatar Pro kit for $159 if you need gyros-stabilization.
Walksnail Nano V3: Installation and Wiring
Before installing it on a drone frame, I did a “dry” test to see if it binds with my Avatar VRX module and works properly. It can be very frustrating to find out that a part is not working after everything is wired and assembled.
Next, I downloaded and installed the latest Avatar 34.40.15_beta firmware on my VRX. The process is straightforward; you only need to copy the appropriate image file (Avatar_Sky_34.40.15.img for VTX, AvatarSE_Gnd_34.40.15.img for VRX, or Avatar_Gnd_34.40.15.img for goggles) on the device’s memory and press the bind button for 8 seconds. The VTX already had the latest firmware (an Avatar_version.txt file on the internal memory’s root showing the software version). The Avatar V3 VTX becomes hot (80-90°C) on the workbench without natural airflow, so I recommend using a fan during configuration and firmware upgrades.
Previously, I mentioned that the WN Nano HD V3 VTX comes with a preinstalled 4-pin plug, which I supposed is not compatible with my FC’s Air Unit 6-pin socket (that has a second GND and SBUS pin for the built-in radio receiver). After double-checking the pin order, I inserted it, and it proved to work this way.
Walksnaill includes mounting screws for both VTX and Camera. The VTX has two mounting patterns. If you opt for 25.5*25.5mm, you must replace the stock M2 screws that hold together the VTX with longer ones. For 20x20mm, the VTX has M3 screw holes. As it has a height of close to 10mm, there was not enough room in my Skystars Bolt5 freestyle frame to install it on top of the ESC + FC stack, so I mounted it in a BetaFPV Pavo25 drone. It fits perfectly inside the 2.5″ CineWhoop frame, but I need to cut a bigger hole to access the data port of the VTX for file transfer.
Power options
The Avatar Nano V3 kit can be powered from 3.1 to 13 volts according to the technical specs. When it is installed in 1-3S setups, it can be wired directly to the LIPO battery. For 1s builds, I recommend using a 5V step-up voltage regulator to avoid black screens midflight – battery voltage can drop to 2.6-3V during acrobatic maneuvers. For 4S and 6S drones, you must power the VTX from a 10V BEC (Battery Eliminator Circuit) found on most flight controllers.
Avatar Nano V3: Canvas OSD
The entire Walksnail ecosystem, including the Avatar Nano, fully supports Betaflight OSD and LUA scripts. You can operate the OSD menu using your sticks, and all the OSD elements can be displayed.
To display BetaFlight telemetry information on your FPV goggles, you need to perform the following two commands:
- set osd_displayport_device = MSP
- set displayport_msp_serial = Y (Where Y is one less than the number of the serial port. e.g.: Y = 2 for serial 3)
Walksnail’s new Racing Mode for consistent, smooth latency
Together with the Avatar Nano V3 kit, Walksnail released a new firmware that enables “Race Mode”. You can easily switch between “Standard” and “Race” modes in the main settings (device tab) of your display (FPV goggles or RVX). Note: The device will restart, so you should avoid doing this midflight!
I like to fly FPV, but mainly just crossing at low speed, admiring nature, and maybe following some birds. Somehow, my brain can’t accept fast speed and agile maneuvers, and the motion sickness kills all the fun. I usually set the highest video quality video, without considering that this can increase the delay in the live feed. Instead, low and stable latency is critical if you’re into high-speed racing, freestyling, or flying through gates, trees, abandoned buildings (bando), and other obstacles.
When racing mode is selected, a 9th channel named RP becomes available, and video resolution is reduced from 720p/1080p to 540p to prioritize transmission stability. Luckily, the downscale affects only the live link, not the onboard recording.
WN Avatar HD Nano V3: Performance
During my tests, in Race mode, latency was between 19-27ms; in Standard mode, I saw values close to 40ms. Joshua Bardwell had about the same results in his test video.
Unfortunately, during the low-light performance test, I hit a tree in the dark, and when I crashed, the propeller cut the coax cable between the camera and VTX even though it has protective mesh sleeving. Lesson learned: every cable needs to be zip-tied to the frame.
Walksnail Avatar HD Nano V3: Takeaways
- Up to 1080P@60fps with a 4:3 native sensor that provides smooth and stunning images. With this kit, you can capture flying footage with exceptional clarity and detail.
- With wide input voltage (3.1-13V) and 500mW power output, you’ll be able to fly various kinds of drones with amazing video quality and range.
- Nano camera V3 with dimensions of 14*14mm and a weight of only 3g, equipped with a 2.1mm lens and 160° FOV, provides clearer and more realistic image quality.
- The Avatar V3 VTX comes with 32g built-in storage; it can record 1080p HD and interference-free flight footage without adding an extra SD card and an action camera, reducing the overall weight of the drones and extending the flight time, allowing you to experience a more comfortable flight while recording 1080 FHD videos.
- Canvas Mode supports BetaFlight, Kiss, Inav, and ArduPilot full OSD display and customization. You’ll be able to customize various OSD fonts, colors, and patterns you like and easily adjust the parameters you want via remote control.
Technical specifications
| Avatar V3 VTX (FPV HD digital video transmitter) | |
| Communication Frequency | 5.725-5.850GHz |
| Transmitter Power (EIRP) | FCC:<27dBm;CE:<14dBm;SRRC:<20dBm;MIC:<25dBm |
| I/O Interface | JST1.0*4 (Power in) JST0.8*4 (USB) |
| Mounting Holes | 25.5*25.5mm (M2) & 20*20mm (M3) |
| Dimensions | 31.5*31.5*9.4mm |
| Storage | 32G |
| Recording | 1080p/720p |
| Weight | 13.4g |
| Operating Temperature | -20-40℃ |
| Channels | 8 |
| Wide Power Input | 3.1V-13V (1S-3S / 10V BEC) |
| Supported FC System | Betaflight, Inav, KISS, Fettec, ArduPilot |
| OSD | Canvas mode |
| Latency | Average delay 22ms |
| Antenna | 1(IPEX) |
| Avatar Nano Camera V3 | |
| Image Sensor | 1/3.2-Inch 4Mp 4:3 sensor |
| Resolution | 1080P/60fps,720P/120fps,720P/60fps |
| Image ratio | 4:3 native / 16:9 |
| Lens | 2.1mm |
| FOV | 160° |
| Aperture | F2.0 |
| Shutter | Rolling shutter |
| Min. Illumination | 0.001Lux |
| Dimensions | 14*14*16.8mm |
| Weight | 3g |
| Avatar V2 Antenna | |
| Polarization | LHCP |
| Bandwidth | 5600MHz-6000MHz |
| Average Gain | 1.9dBi |
| Interface | IPEX-1 |
| Line Length | 105mm |
| Dimension | R15*45mm (without cable) |
| Weight | 2g |


Leave a comment
All comments are moderated before being published.
This site is protected by hCaptcha and the hCaptcha Privacy Policy and Terms of Service apply.